Hey there, fitness warriors! I'm Master Kim, your Certified Personal Trainer (CPT) and Biomechanics Specialist at BeSlim.me. If you've ever felt that nagging twinge in your knees or back during squats, or if you're a beginner who's intimidated by this powerhouse move, you're in the right place. Squats are one of the most effective exercises for building strength, boosting metabolism, and torching fat—but only if done right. Poor form can lead to injuries and suboptimal results, which is why today we're diving deep into fixing your squat form with five science-backed cues tailored for beginners. This guide is all about safe, practical steps you can apply at home or in the gym. We'll cover the science, safety essentials, actionable cues, a quick 30-minute routine, and a progression plan to keep you advancing safely. Let's get you squatting like a pro—safely and effectively!
By the end of this guide, you'll have the tools to perform squats that not only feel great but also supercharge your fat-loss journey. Remember, consistency and proper technique are your best friends. Let's build that strong foundation!
Why Focus on Squat Form?
Squats engage multiple muscle groups, including your quads, hamstrings, glutes, and core, making them a cornerstone of any fat-loss program. But improper form—like letting your knees cave in or rounding your back—can strain joints and reduce the exercise's effectiveness. Fixing your form isn't just about avoiding injury; it's about maximizing muscle activation for better calorie burn and metabolic boosts. As a biomechanics specialist, I've seen countless clients transform their workouts (and bodies) by nailing these basics. Stick with me, and you'll squat with confidence!
Safety First: Essential Warnings and Form Checks
Before we jump into the cues or routines, safety is non-negotiable. As your trainer at BeSlim.me, I always emphasize that improper squat form can lead to knee, back, or hip issues, especially for beginners or those with joint concerns. If you have pre-existing conditions like arthritis or recent injuries, consult a doctor before starting. Start with bodyweight squats only—no added weights until your form is solid. Always warm up with 5-10 minutes of light cardio (like marching in place) and dynamic stretches.
Mandatory Safety Warnings and Form Instructions for Beginners:
- Consult a Professional: If you're new to exercise, pregnant, or have any medical conditions, get clearance from a healthcare provider.
- Listen to Your Body: Stop immediately if you feel sharp pain (dull muscle fatigue is okay). Pain in joints means form adjustment is needed.
- Breathing Technique: Inhale on the way down, exhale on the way up to engage your core and stabilize your spine.
- General Form Check: Feet shoulder-width apart, toes slightly turned out. Keep your chest up, back straight (neutral spine), and knees tracking over toes. Engage your core throughout—imagine bracing for a punch. Descend until thighs are parallel to the ground or as low as comfortable without pain. Push through your heels to stand, squeezing your glutes at the top.
- Common Pitfalls to Avoid: Don't let knees cave inward or heels lift off the ground. Avoid arching or rounding your back—maintain a neutral position.
- Equipment Note: For home workouts, use a stable chair for support if needed. In the gym, start without a barbell.
Remember, form trumps speed or weight every time. Master these basics, and you'll build a injury-resistant body while accelerating fat loss.
The Science Behind How to Fix Squat Form and Metabolism
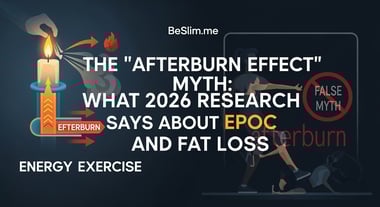
Let's geek out on the "why" behind perfecting your squat form—it's not just about looking good in the mirror; it's rooted in physiology that directly impacts fat loss and metabolism. Proper squat technique optimizes muscle recruitment, which enhances your basal metabolic rate (BMR)—the calories your body burns at rest. When you fix form issues, like improper knee alignment, you activate larger muscle groups more efficiently, leading to greater energy expenditure during and after workouts. This is due to the afterburn effect, known as excess post-exercise oxygen consumption (EPOC), where your body continues burning calories to recover.
Scientifically, resistance exercises like squats increase muscle mass, and each pound of muscle burns about 6-10 calories per day at rest compared to fat's 2-3 calories. Research on resistance training and metabolic rate shows that compound movements like squats can elevate BMR by up to 15% over time, aiding sustainable fat loss. Moreover, correcting form reduces joint stress, preventing inflammation that could hinder recovery and metabolism. For instance, proper hip hinging in squats engages the posterior chain (glutes and hamstrings), which boosts hormonal responses like testosterone and growth hormone release—key players in fat metabolism.
From a biomechanics standpoint, aligned squats improve neuromuscular efficiency, meaning your brain and muscles communicate better for stronger, more calorie-torching contractions. Studies from the Mayo Clinic on squat biomechanics highlight how cues like "knees out" prevent valgus collapse, reducing injury risk by 20-30% and allowing consistent training. Ultimately, fixing squat form isn't optional—it's a metabolic game-changer that turns your workouts into fat-burning machines. Pair this with a balanced diet, and you'll see real results!
5 Science-Backed Cues for Fixing Your Squat Form
Now, the heart of this guide: five practical, science-supported cues to transform your squats. These are beginner-friendly, drawn from biomechanics research, and designed to address common errors. I'll explain each cue, why it works (with science tie-ins), and how to apply it. Practice in front of a mirror or record yourself for feedback. Aim for slow, controlled reps—quality over quantity!
Cue 1: "Brace Your Core Like a Boxer"
- Why It Works: Engaging your core stabilizes the spine, preventing lower back strain and allowing better force transfer from your legs to your upper body. This cue boosts intra-abdominal pressure, which NIH research on core stability in squats links to improved lifting efficiency and a 10-15% increase in muscle activation for fat-burning potential.
- How to Apply: Before descending, take a deep breath and tighten your abs as if preparing for a punch. Hold this brace throughout the squat. Start with 3 sets of 10 bodyweight reps, focusing solely on this.
Cue 2: "Push the Floor Away with Your Heels"
- Why It Works: This shifts weight to your heels, activating glutes and hamstrings more than quads alone, creating a balanced posterior chain for better power and metabolism. It prevents forward knee travel, reducing patellar stress—backed by studies showing heel-driven squats lower injury rates by improving biomechanics.
- How to Apply: Imagine spreading the floor apart with your feet. As you rise, drive through your heels, not toes. Try this with a wall behind you for support if needed.
Cue 3: "Knees Out, Track Over Toes"
- Why It Works: Preventing knees from caving in (valgus) protects the ACL and ensures even muscle loading, which enhances caloric burn through full quad and glute engagement. Research indicates this cue can increase squat depth safely, amplifying metabolic benefits.
- How to Apply: Actively push your knees outward to align with your toes during the descent. Use a resistance band around your knees for feedback if you're at the gym.
Cue 4: "Chest Up, Eyes Forward"
- Why It Works: Keeping your chest lifted maintains a neutral spine, reducing shear forces on the lower back. This posture optimizes breathing and core engagement, leading to higher EPOC for post-workout fat loss.
- How to Apply: Pick a spot on the wall at eye level and keep your gaze there. Avoid looking down, which can round your back.
Cue 5: "Squeeze Glutes at the Top"
- Why It Works: Activating glutes at the peak locks in hip extension, completing the movement and firing up your largest muscle group for maximum calorie torch. This cue supports hormonal fat-loss responses by fully recruiting fast-twitch fibers.
- How to Apply: At the top of each rep, consciously squeeze your butt cheeks together for 1-2 seconds before the next rep.
Incorporate these cues one at a time over a week to build habits. With practice, they'll feel natural, and your squats will become a fat-loss powerhouse!
30-Minute Workout Routine: Putting Cues into Practice
Ready to apply what you've learned? This beginner-friendly, 30-minute routine incorporates squat variations with our cues to fix form while building strength and boosting metabolism. It's suitable for home (no equipment needed) or gym settings. Do a 5-minute warm-up (jog in place, arm circles) and cool down with stretches. Perform 2-3 times per week, with rest days in between. Total time: 30 minutes, including short rests (30-60 seconds between sets).
Bodyweight Squat
- Sets x Reps: 3 sets of 10-12 reps
- Key Form Cue / Technical Focus: Brace your core like a boxer
- Difficulty Level: Beginner
Wall Squat Hold
- Sets x Reps (or Time): 3 sets of 20-30 seconds hold
- Key Form Cue / Technical Focus: Push the floor away with your heels
- Difficulty Level: Beginner
Goblet Squat (use a water bottle or light dumbbell)
- Sets x Reps: 3 sets of 8-10 reps
- Key Form Cue / Technical Focus: Knees out, track over toes
- Difficulty Level: Beginner/Intermediate
Chair Squat (sit to stand from a chair)
- Sets x Reps: 3 sets of 10 reps
- Key Form Cue / Technical Focus: Chest up, eyes forward
- Difficulty Level: Beginner
Glute Bridge (lie on back, lift hips)
- Sets x Reps: 3 sets of 12 reps
- Key Form Cue / Technical Focus: Squeeze glutes at the top
- Difficulty Level: Beginner
Lunges (alternating legs, bodyweight)
- Sets x Reps: 3 sets of 8 reps per leg
- Key Form Cue / Technical Focus: Combine cues 1 and 3 for stability
- Difficulty Level: Intermediate
This routine targets squat mechanics while keeping things low-impact. It builds lower-body strength, elevates heart rate for fat burn, and reinforces our cues—expect to feel the burn in a good way!
Progression Plan: Level Up Over 4-8 Weeks
Progression is key to avoiding plateaus and ensuring safe gains. Start at Week 1 with the basic routine above, focusing on form over intensity. Here's a simple 4-8 week plan:
- Weeks 1-2: Master bodyweight versions. Add 2-3 extra reps per set if form stays perfect. Track in a journal.
- Weeks 3-4: Introduce light weights (e.g., hold a 5-10 lb dumbbell for goblet squats). Increase hold times by 10 seconds or add a fourth set.
- Weeks 5-6: Incorporate variations like sumo squats (wider stance) to challenge stability. Aim for 12-15 reps, reducing rest to 45 seconds.
- Weeks 7-8: Progress to intermediate moves, like adding a jump to squats (if no joint issues). Monitor for fatigue—rest if needed.
Always prioritize form; if a progression feels off, drop back. Over 8 weeks, you could see improved squat depth, stronger legs, and a noticeable metabolism boost. Celebrate small wins, like pain-free reps!
Actionable Takeaways
- Practice one cue per session to build habits.
- Film your squats weekly to self-assess.
- Combine with nutrition: Pair workouts with protein-rich meals to support muscle repair and fat loss.
- Track progress: Measure thigh circumference or note how clothes fit for motivation.
You've got this! Fixing your squat form is a game-changer for safe, effective fat loss. If you need personalized tweaks, hit up BeSlim.me. Stay strong, stay safe—Master Kim out!
References
- Research on resistance training and metabolic rate - pubmed.ncbi.nlm.nih.gov
- Studies from the Mayo Clinic on squat biomechanics - mayoclinic.org
- NIH research on core stability in squats - ncbi.nlm.nih.gov


Medical Disclaimer
The content on this website is for informational and educational purposes only. It is not intended as medical advice and should not be relied upon as a substitute for consultations with qualified healthcare professionals who are familiar with your individual medical needs. Always seek the advice of your physician or other qualified healthcare provider with any questions you may have regarding a medical condition. Never disregard professional medical advice or delay in seeking it because of something you have read on this website.